Configuration
Client-side App Settings
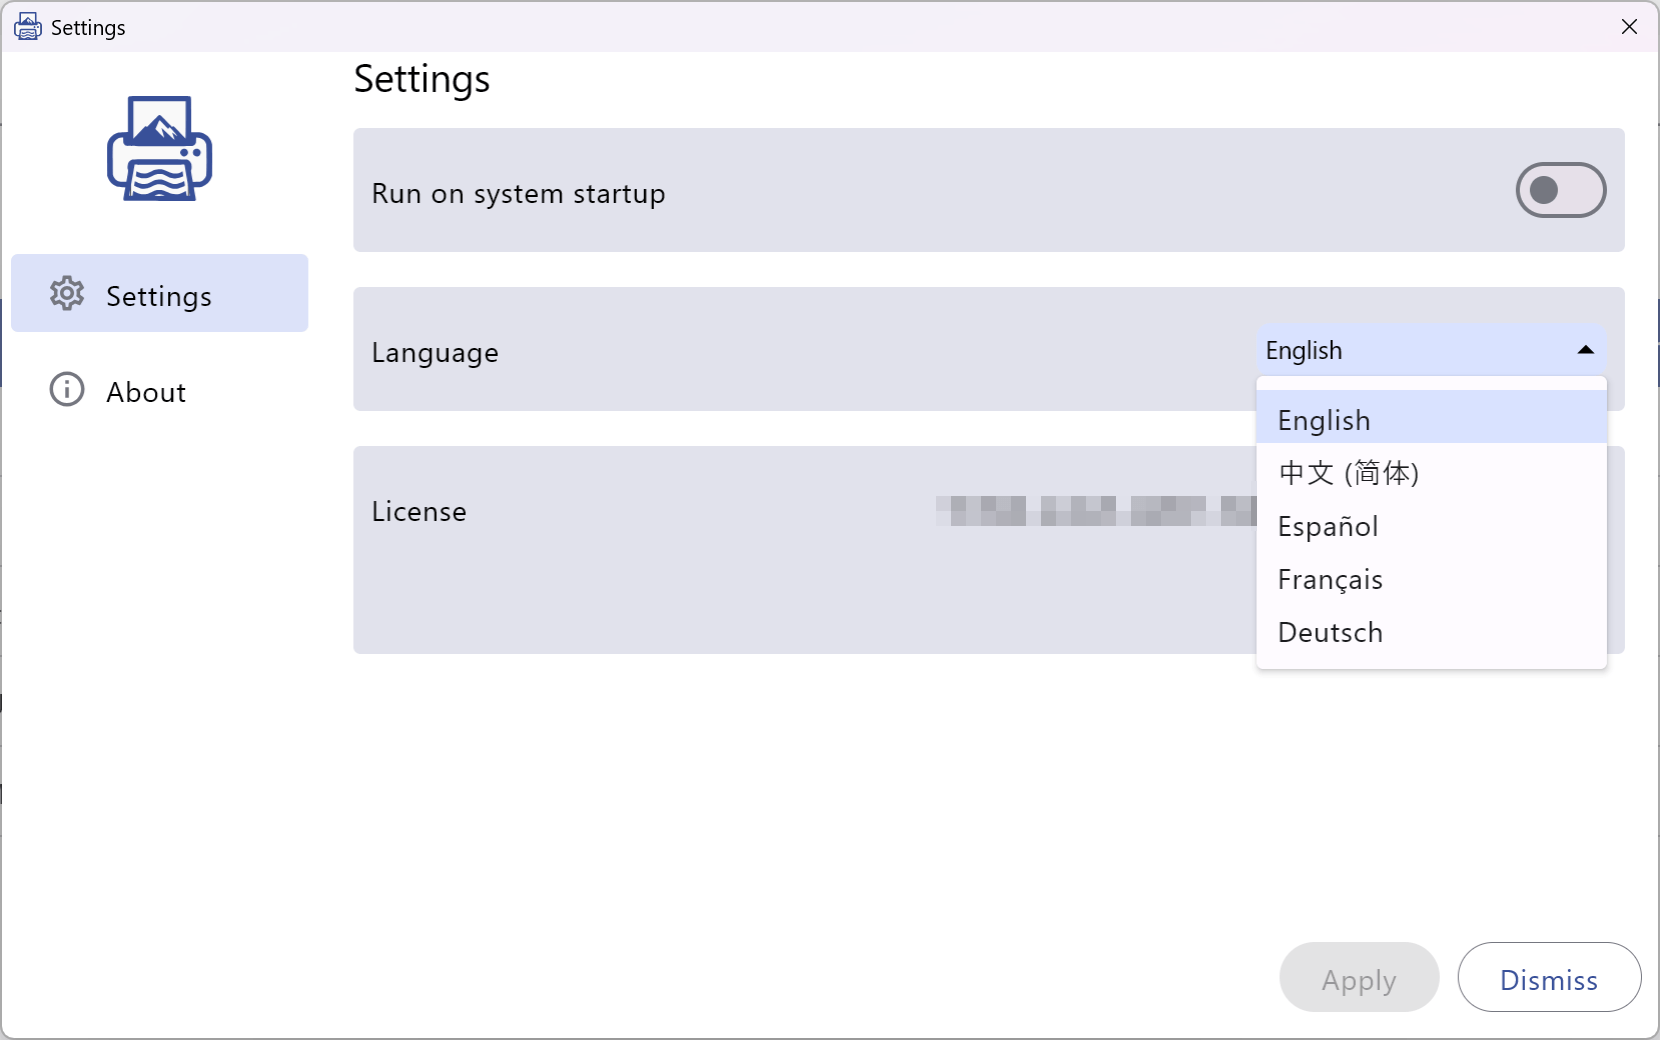
Section titled “Client-side App Settings”General Settings
Section titled “General Settings”| Setting | Description |
|---|---|
| Run on system startup | Enable to run the app on system startup. |
| Language selection | Select the language to use in the app. |
| License management | Manage your license. |
Report Print Settings
Section titled “Report Print Settings”On the client-side app’s Reports page, you can define default print parameters for each Odoo report or apply one set of settings globally.
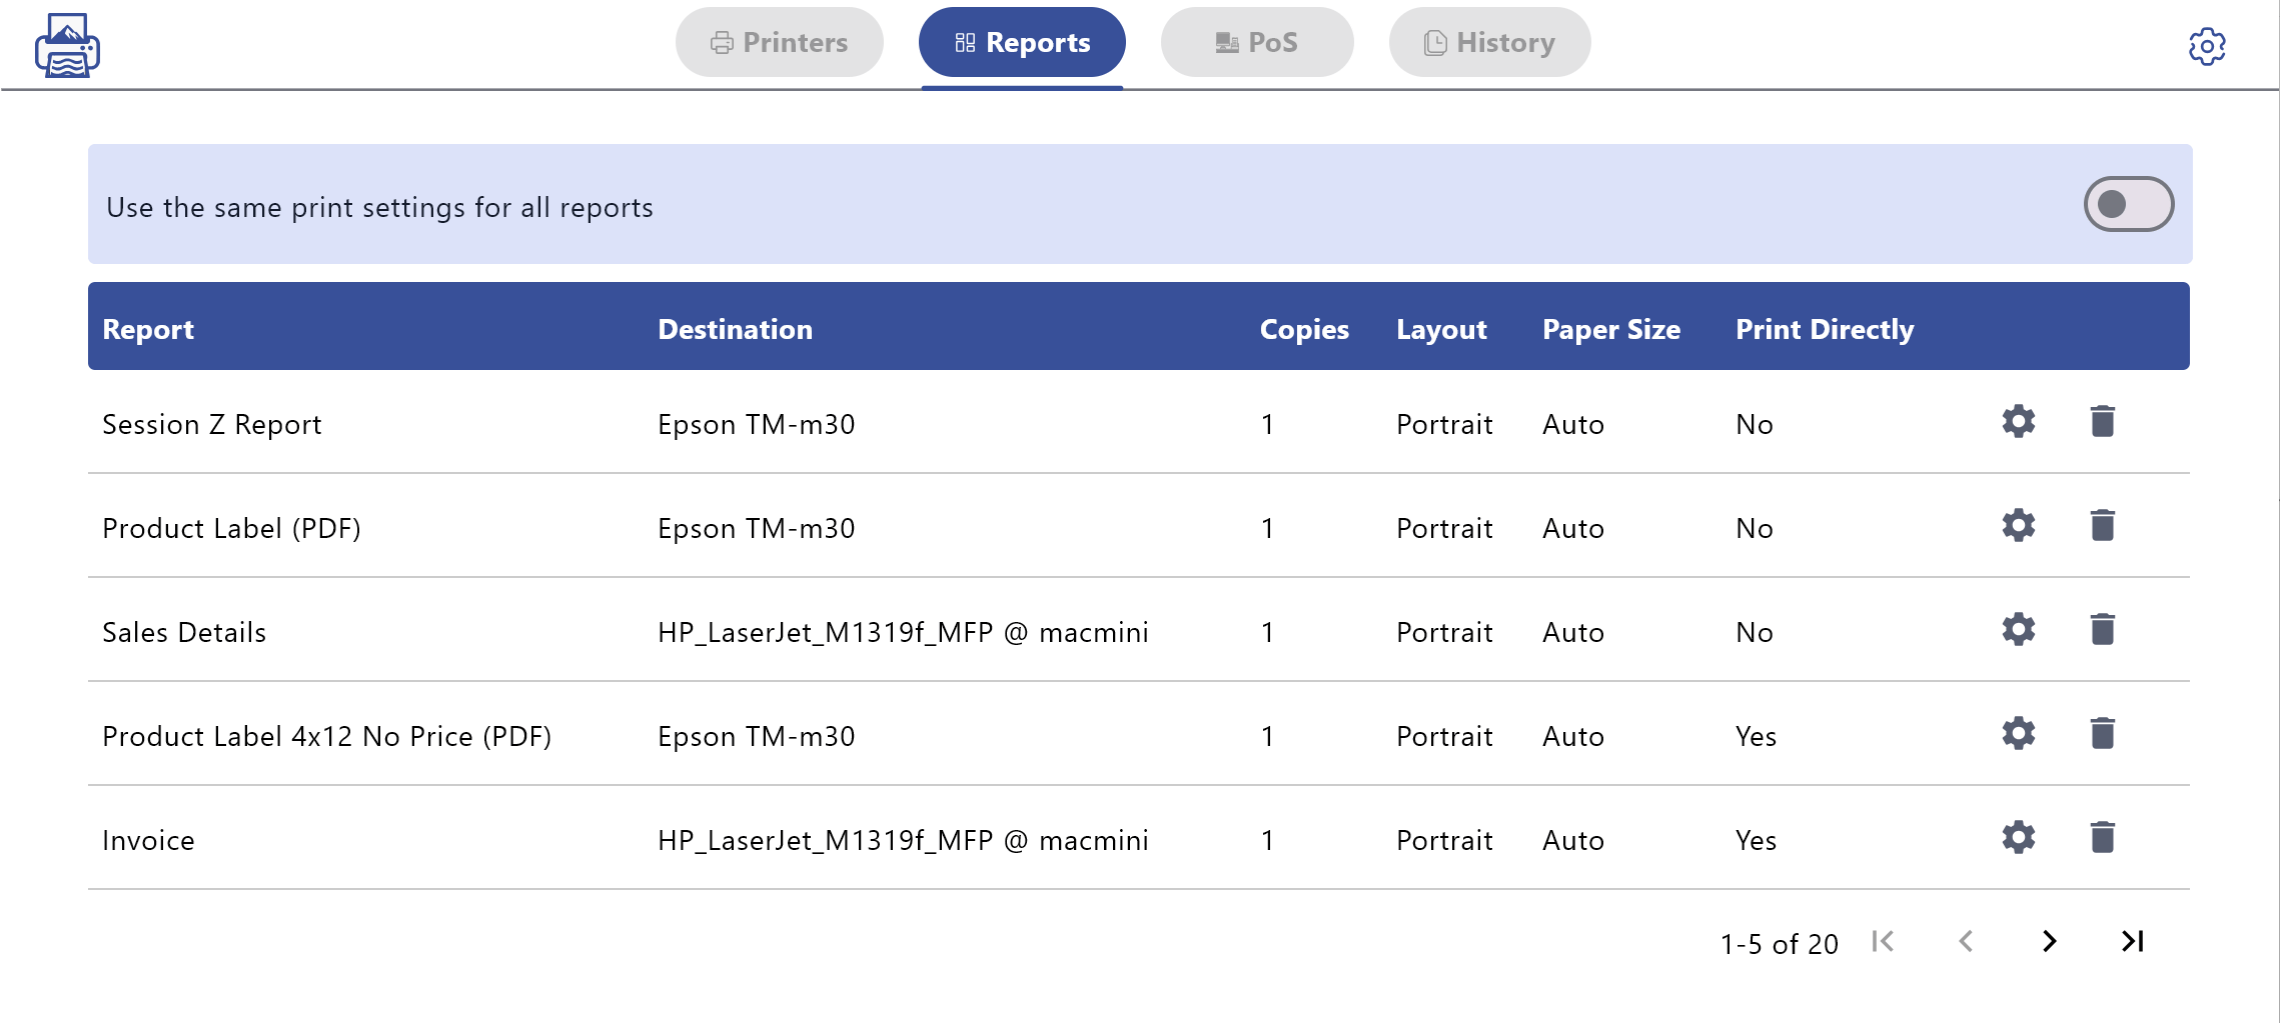
Use the same print settings for all reports: When enabled, all reports share the same print settings. When disabled, you can configure each report individually.
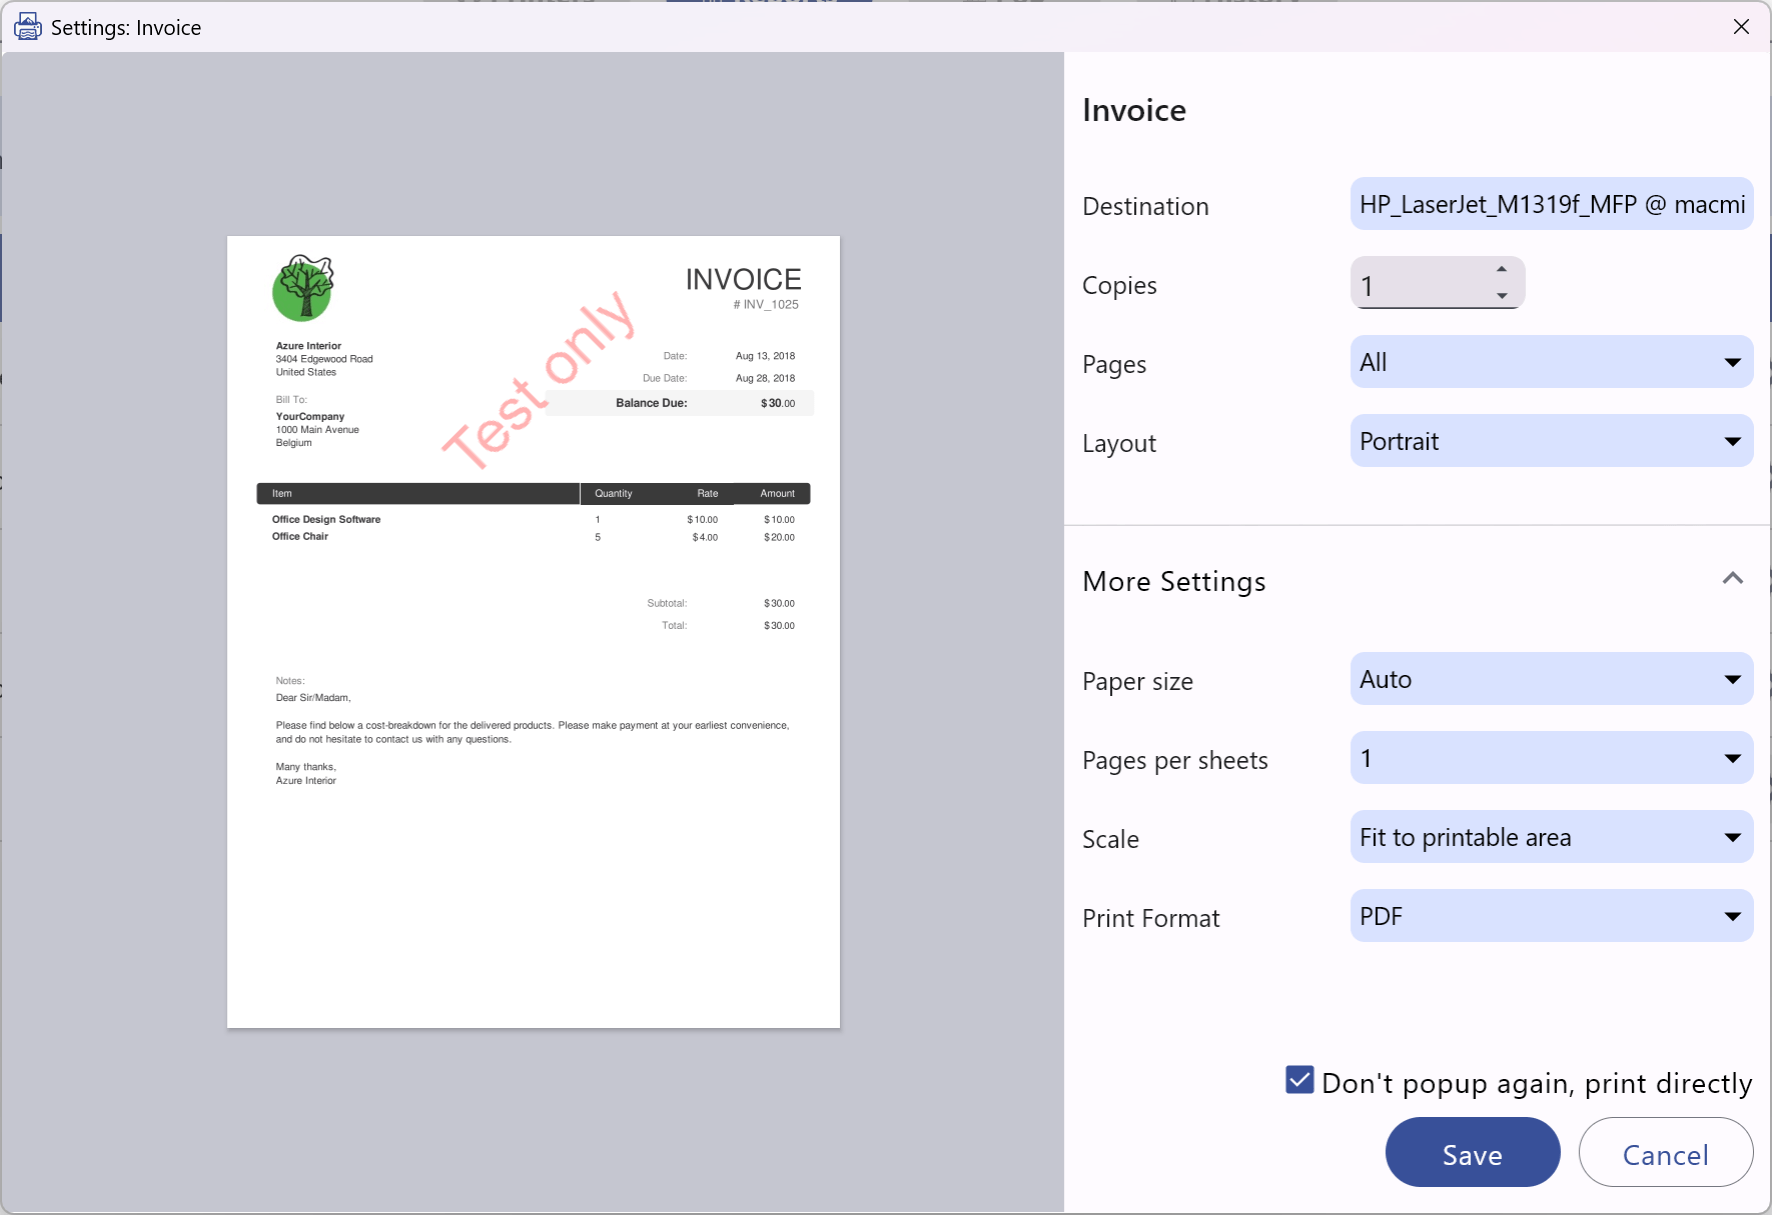
Report print parameters
| Field | Description |
|---|---|
| Destination | Select the target printer. |
| Copies | Number of copies to print. |
| Pages | Pages to print; default is All. |
| Layout | Page orientation, e.g., Portrait. |
| Paper size | Paper size. Default Auto, or A4, Letter, etc. Custom width/height is supported. |
| Pages per sheets | Number of pages printed on each sheet. |
| Scale | Page scaling, e.g., Fit to printable area. |
| Print Format | Output format, including PDF and ESC/POS. This option intents to convert a PDF report to ESC/POS and sends it to ESC/POS printers. |
| Don’t popup again, print directly | When checked, this report prints directly without showing the settings dialog. |
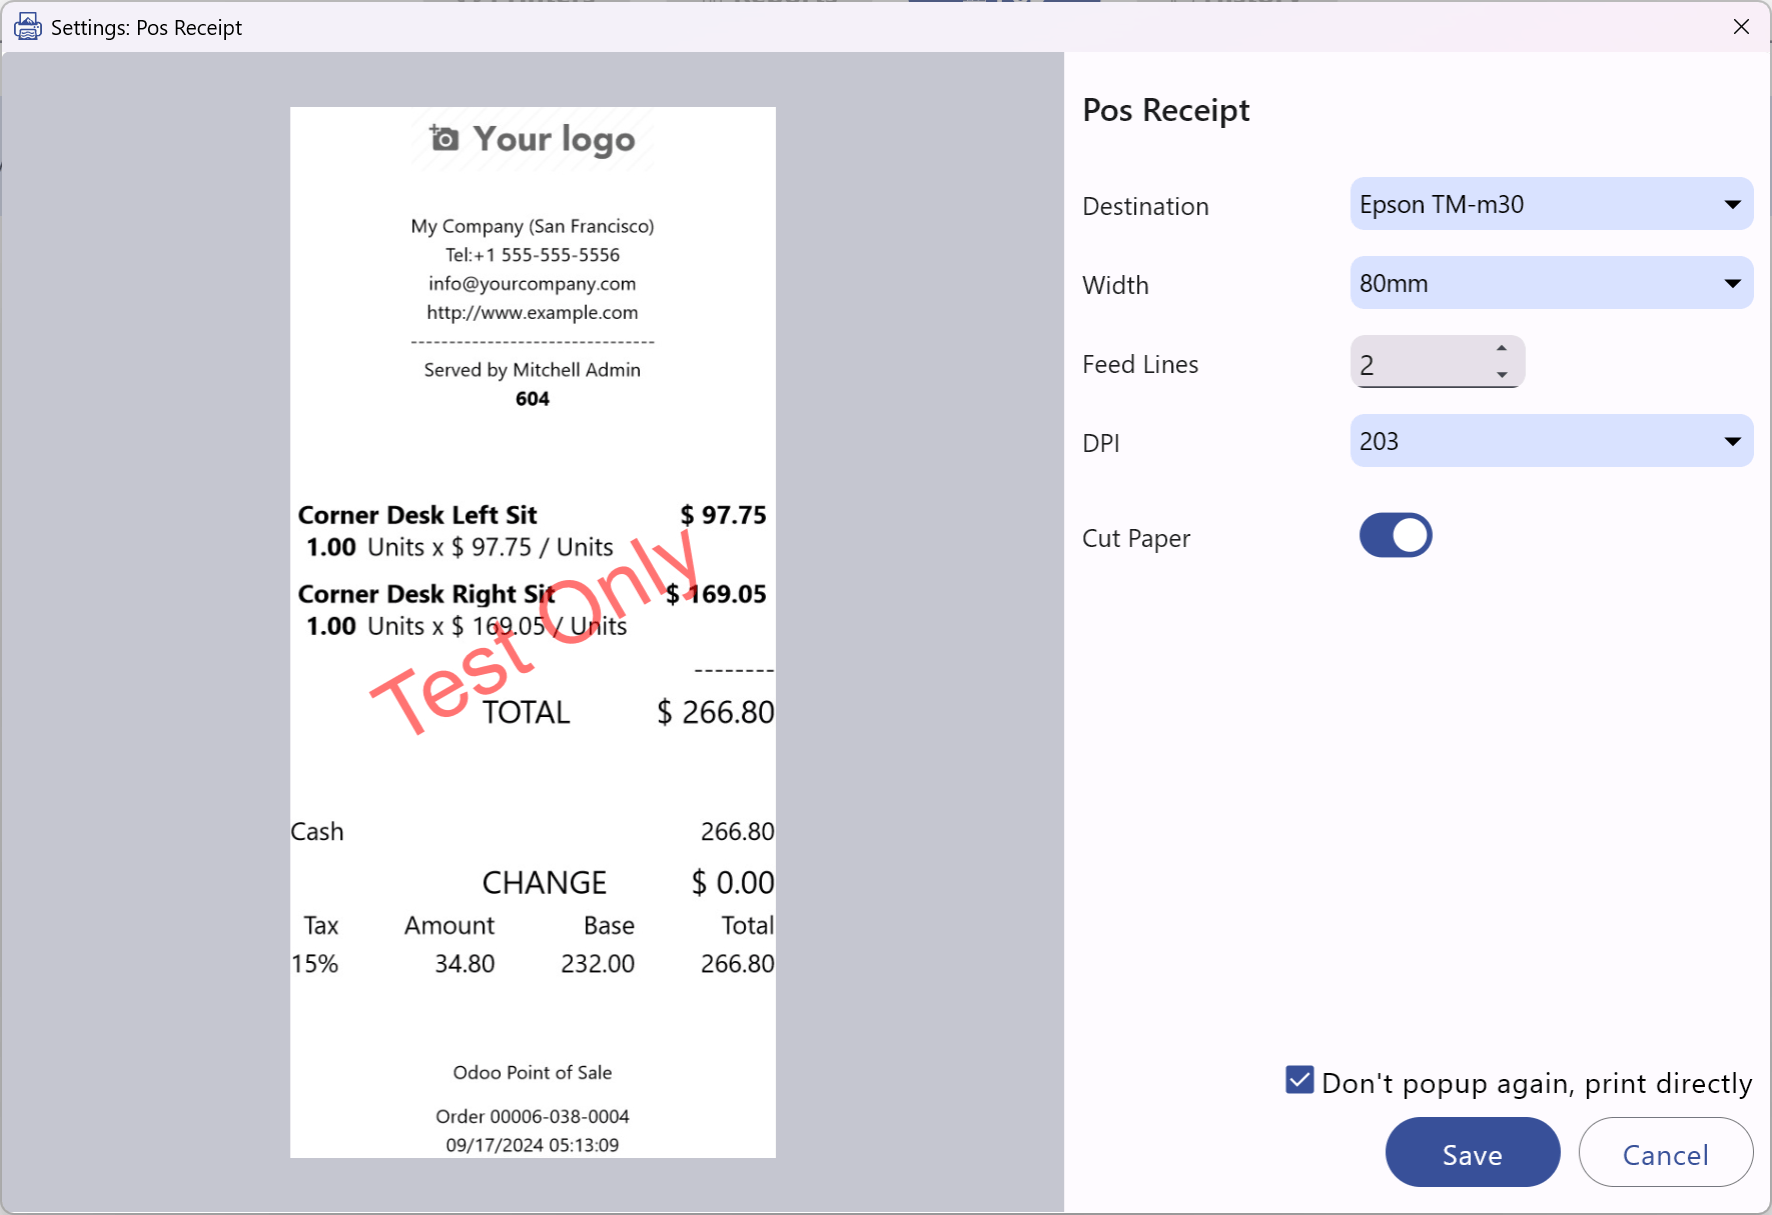
PoS Print Settings
Section titled “PoS Print Settings”On the client-side app’s PoS page, enable ESC/POS printer and cash drawer integration, and configure receipt printing parameters.
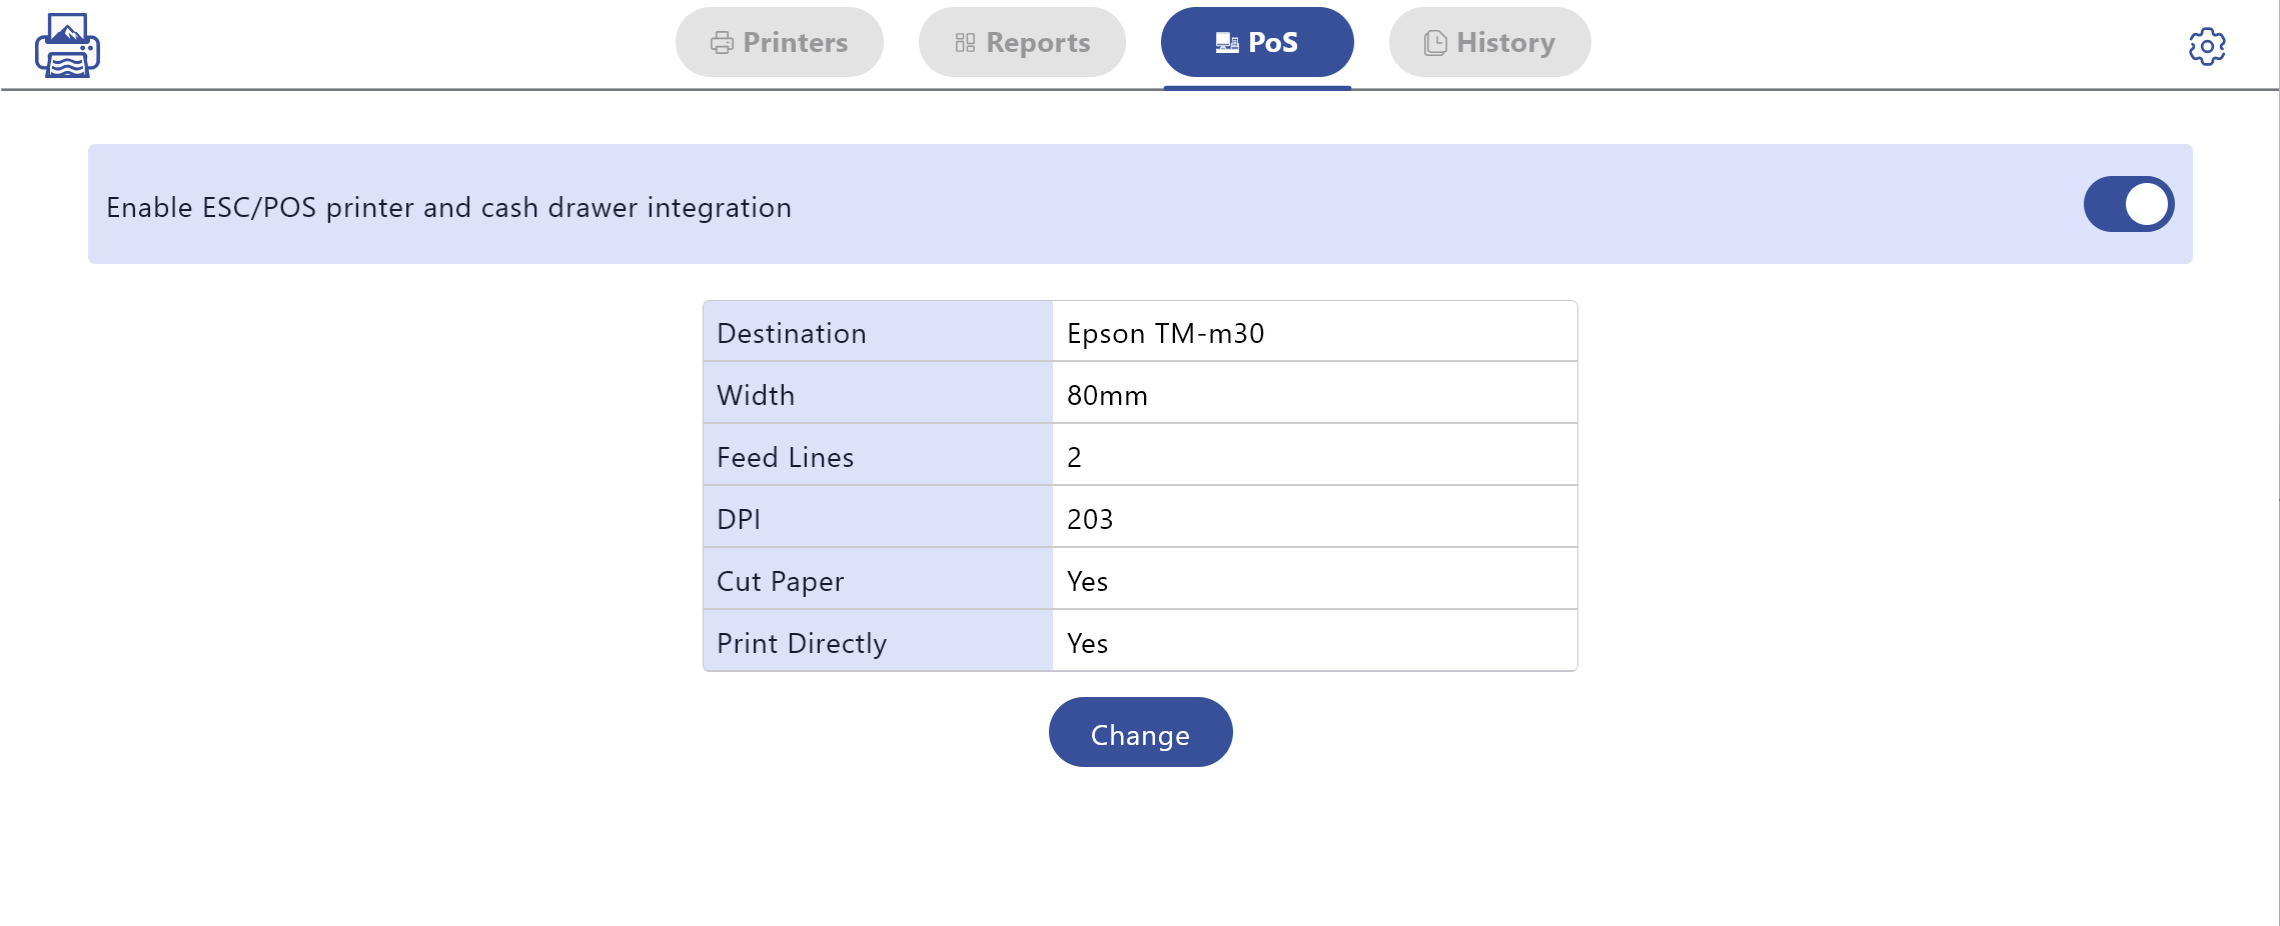
Enable ESC/POS printer and cash drawer integration: Turn on to enable ESC/POS printing and cash drawer integration.
PoS receipt print parameters
| Field | Description |
|---|---|
| Destination | Select the ESC/POS printer (e.g., Epson TM-m30). |
| Width | Paper width, including 58mm or 80mm; must match the printer’s paper width. |
| Feed Lines | Number of feed lines appended after each print to separate receipts. |
| DPI | Print resolution, including 203 or 300. |
| Cut Paper | Whether to auto cut after printing. |
| Don’t popup again, print directly | When checked, PoS receipts print directly without showing this dialog. |
Odoo Configuration
Section titled “Odoo Configuration”General
Section titled “General”There is no general configuration for Omni Print in Odoo.
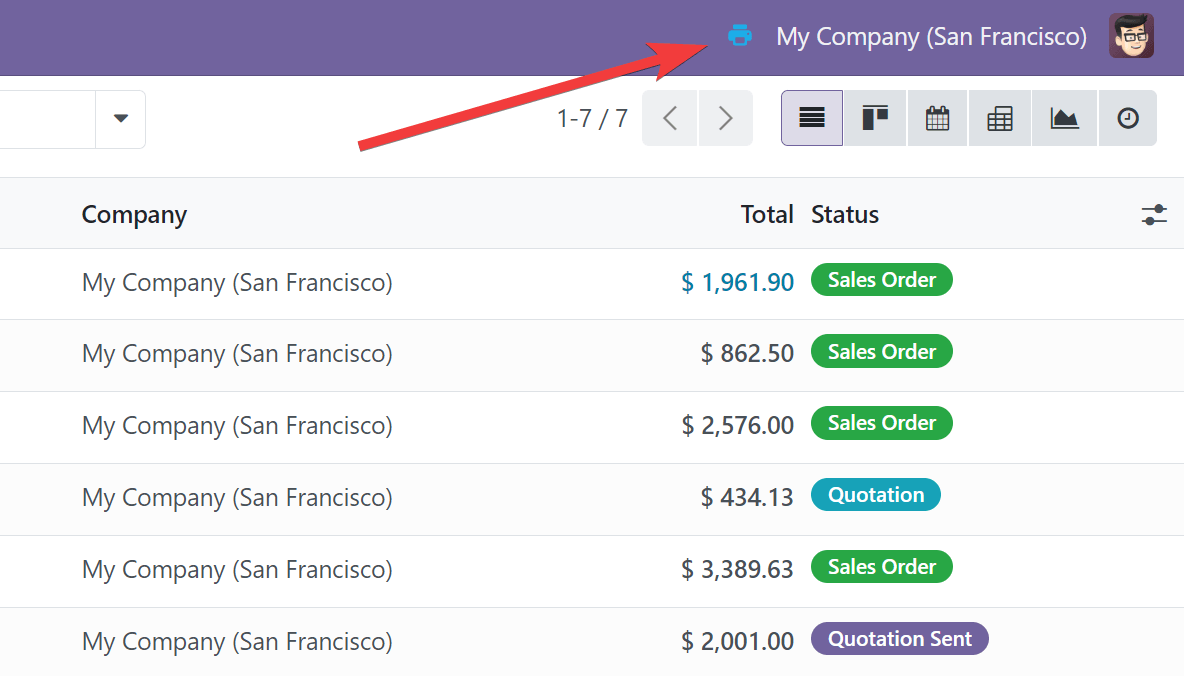
Connection Indicator
Section titled “Connection Indicator”Odoo displays a printer icon in the browser’s system tray area. Odoo automatically connects to Omni Print, and when successfully connected, this printer icon turns blue to indicate an active connection.
If connected, printing will be sent via Omni Print; if not connected, it will automatically fall back to the original Download PDF.
Point of Sale
Section titled “Point of Sale”Navigate to: Point of Sale > Configuration > Connected Devices.
| Setting | Description |
|---|---|
| Use Omni Print | Enable POS receipt printing via Omni Print. |
| Open Cash Drawer | Allow opening the cash drawer through the client-side app. |

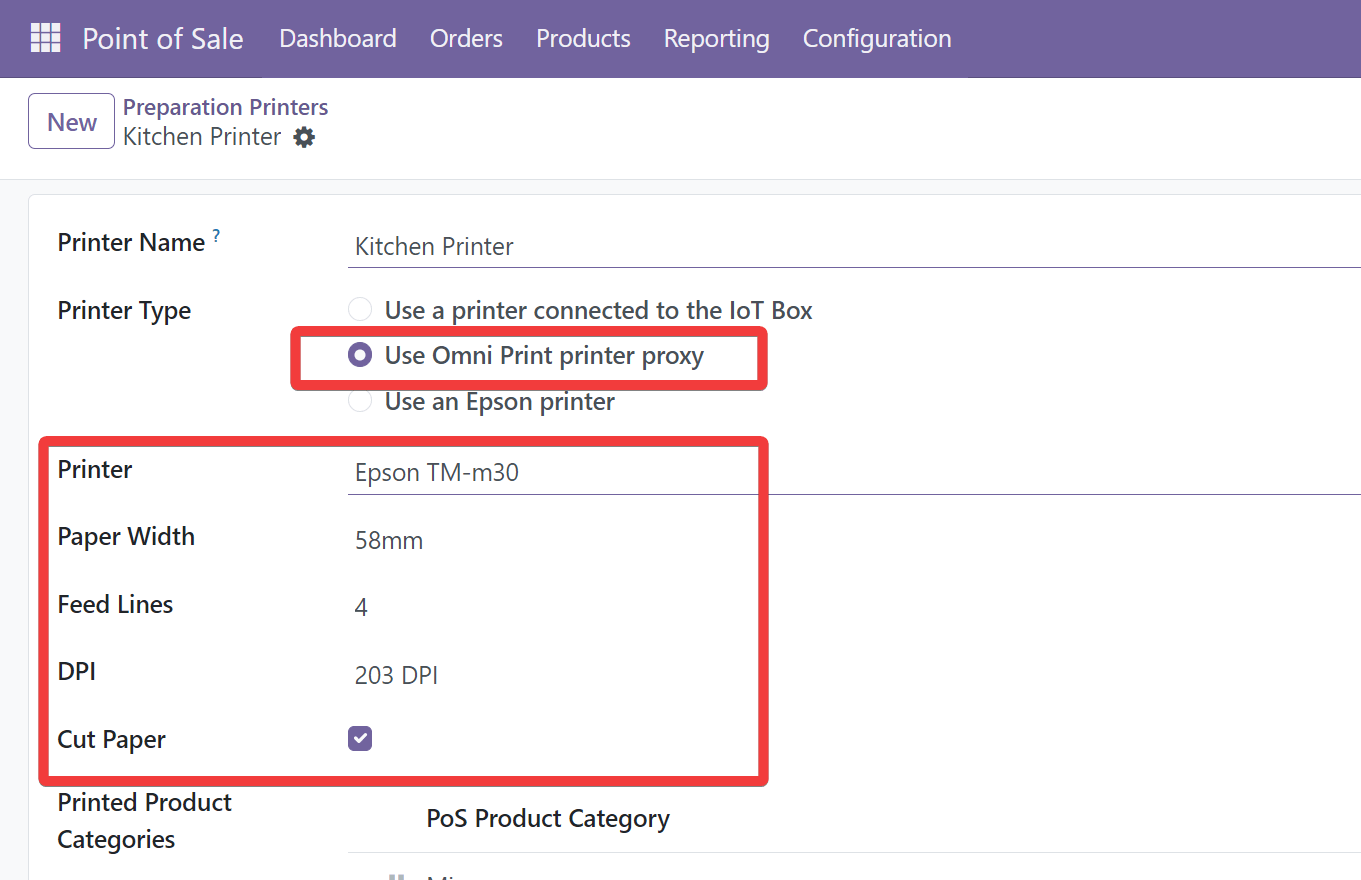
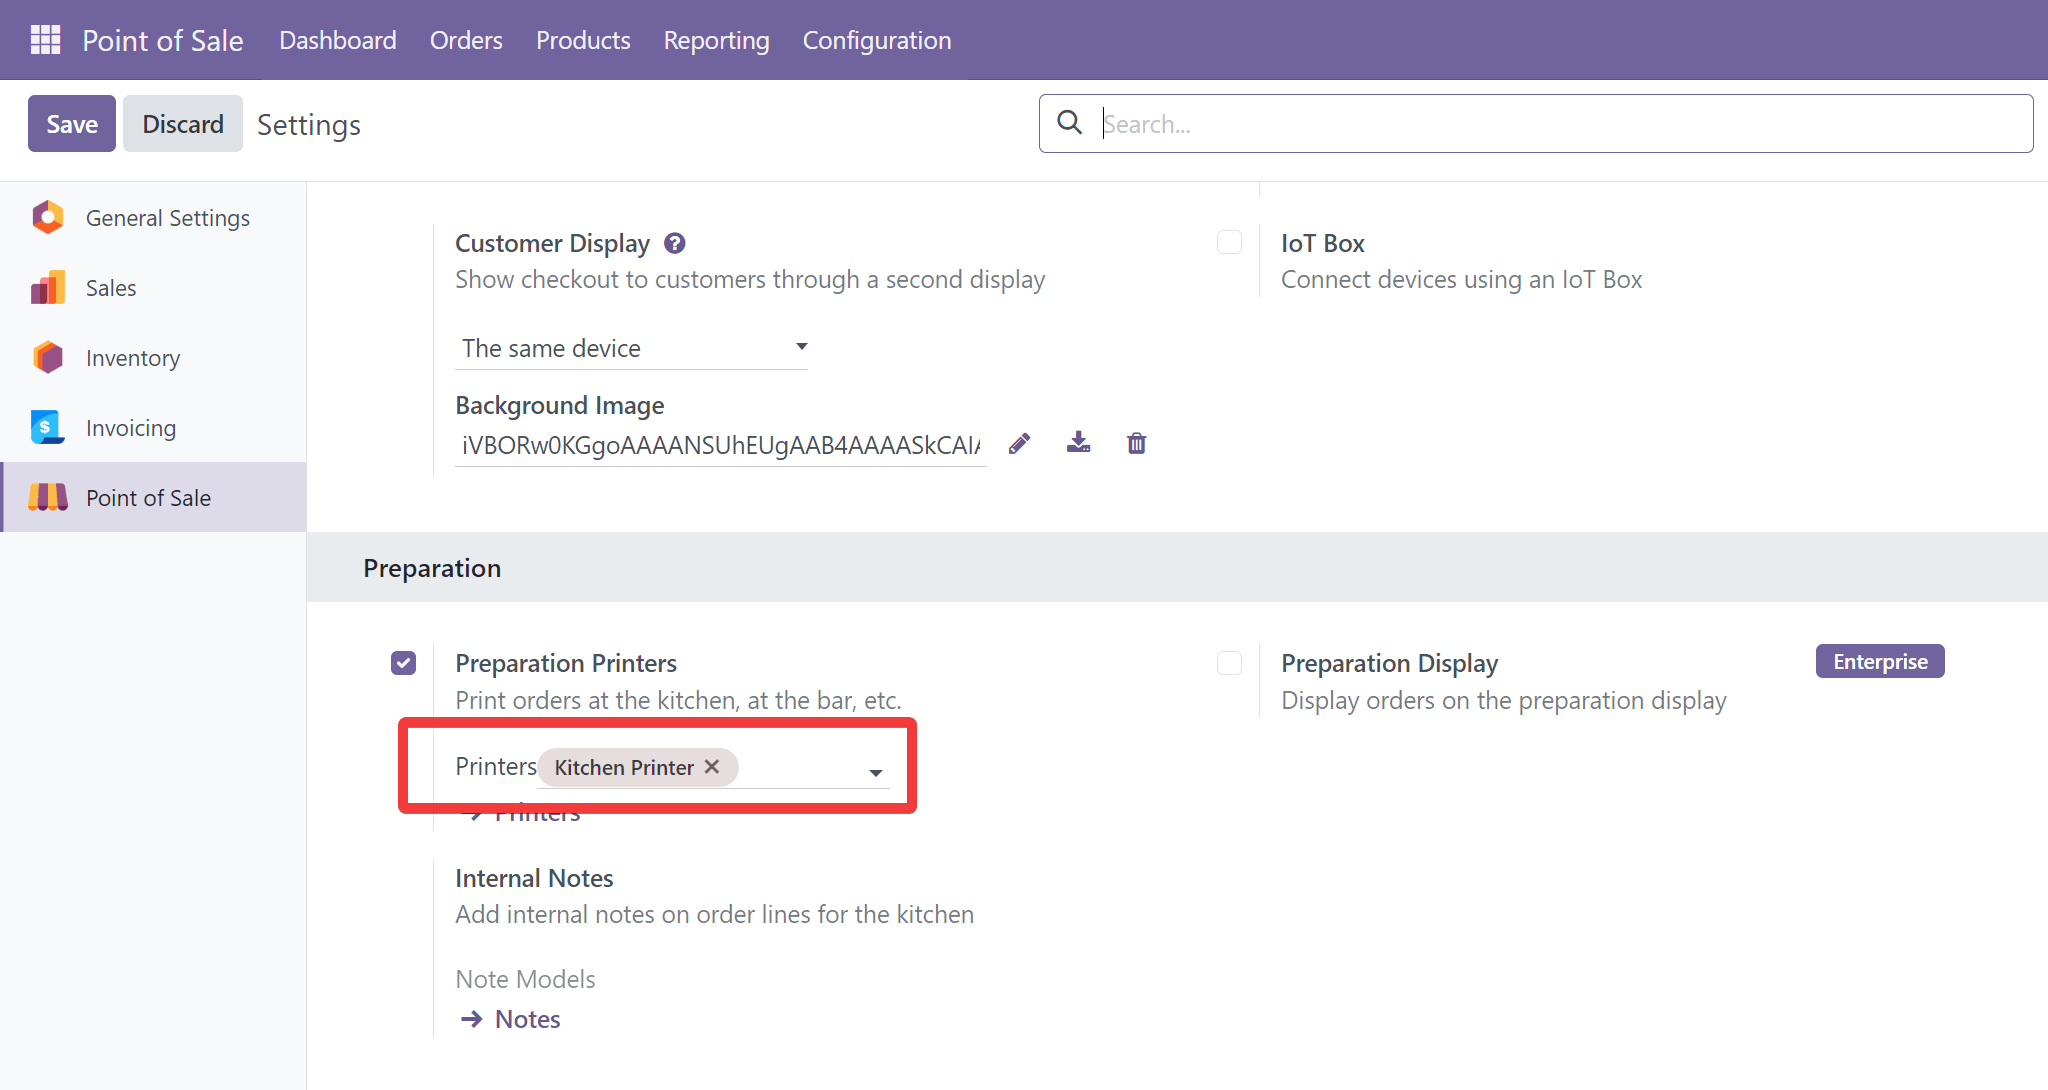
Kitchen Printer (Preparation Printer)
Section titled “Kitchen Printer (Preparation Printer)”Navigate to: Point of Sale > Orders > Preparation Printers > New.
| Field | Example/Options | Notes |
|---|---|---|
| Printer type | Use Omni Print printer proxy | Send jobs via Omni Print. |
| Printer | e.g., Epson TM-m30 | Select your printer model. |
| Paper Width | 58mm or 80mm | Match your printer paper width. |
| Feed Lines | number (e.g., 4) | Blank lines after each print for proper feed and separation. |
| DPI | 203 DPI or 300 DPI | Depends on printer capability. |
| Cut Paper | enabled | Auto cut after printing. |
| Printed Product Categories | e.g., Food | Categories to print in kitchen. |
Add this preparation printer to your PoS
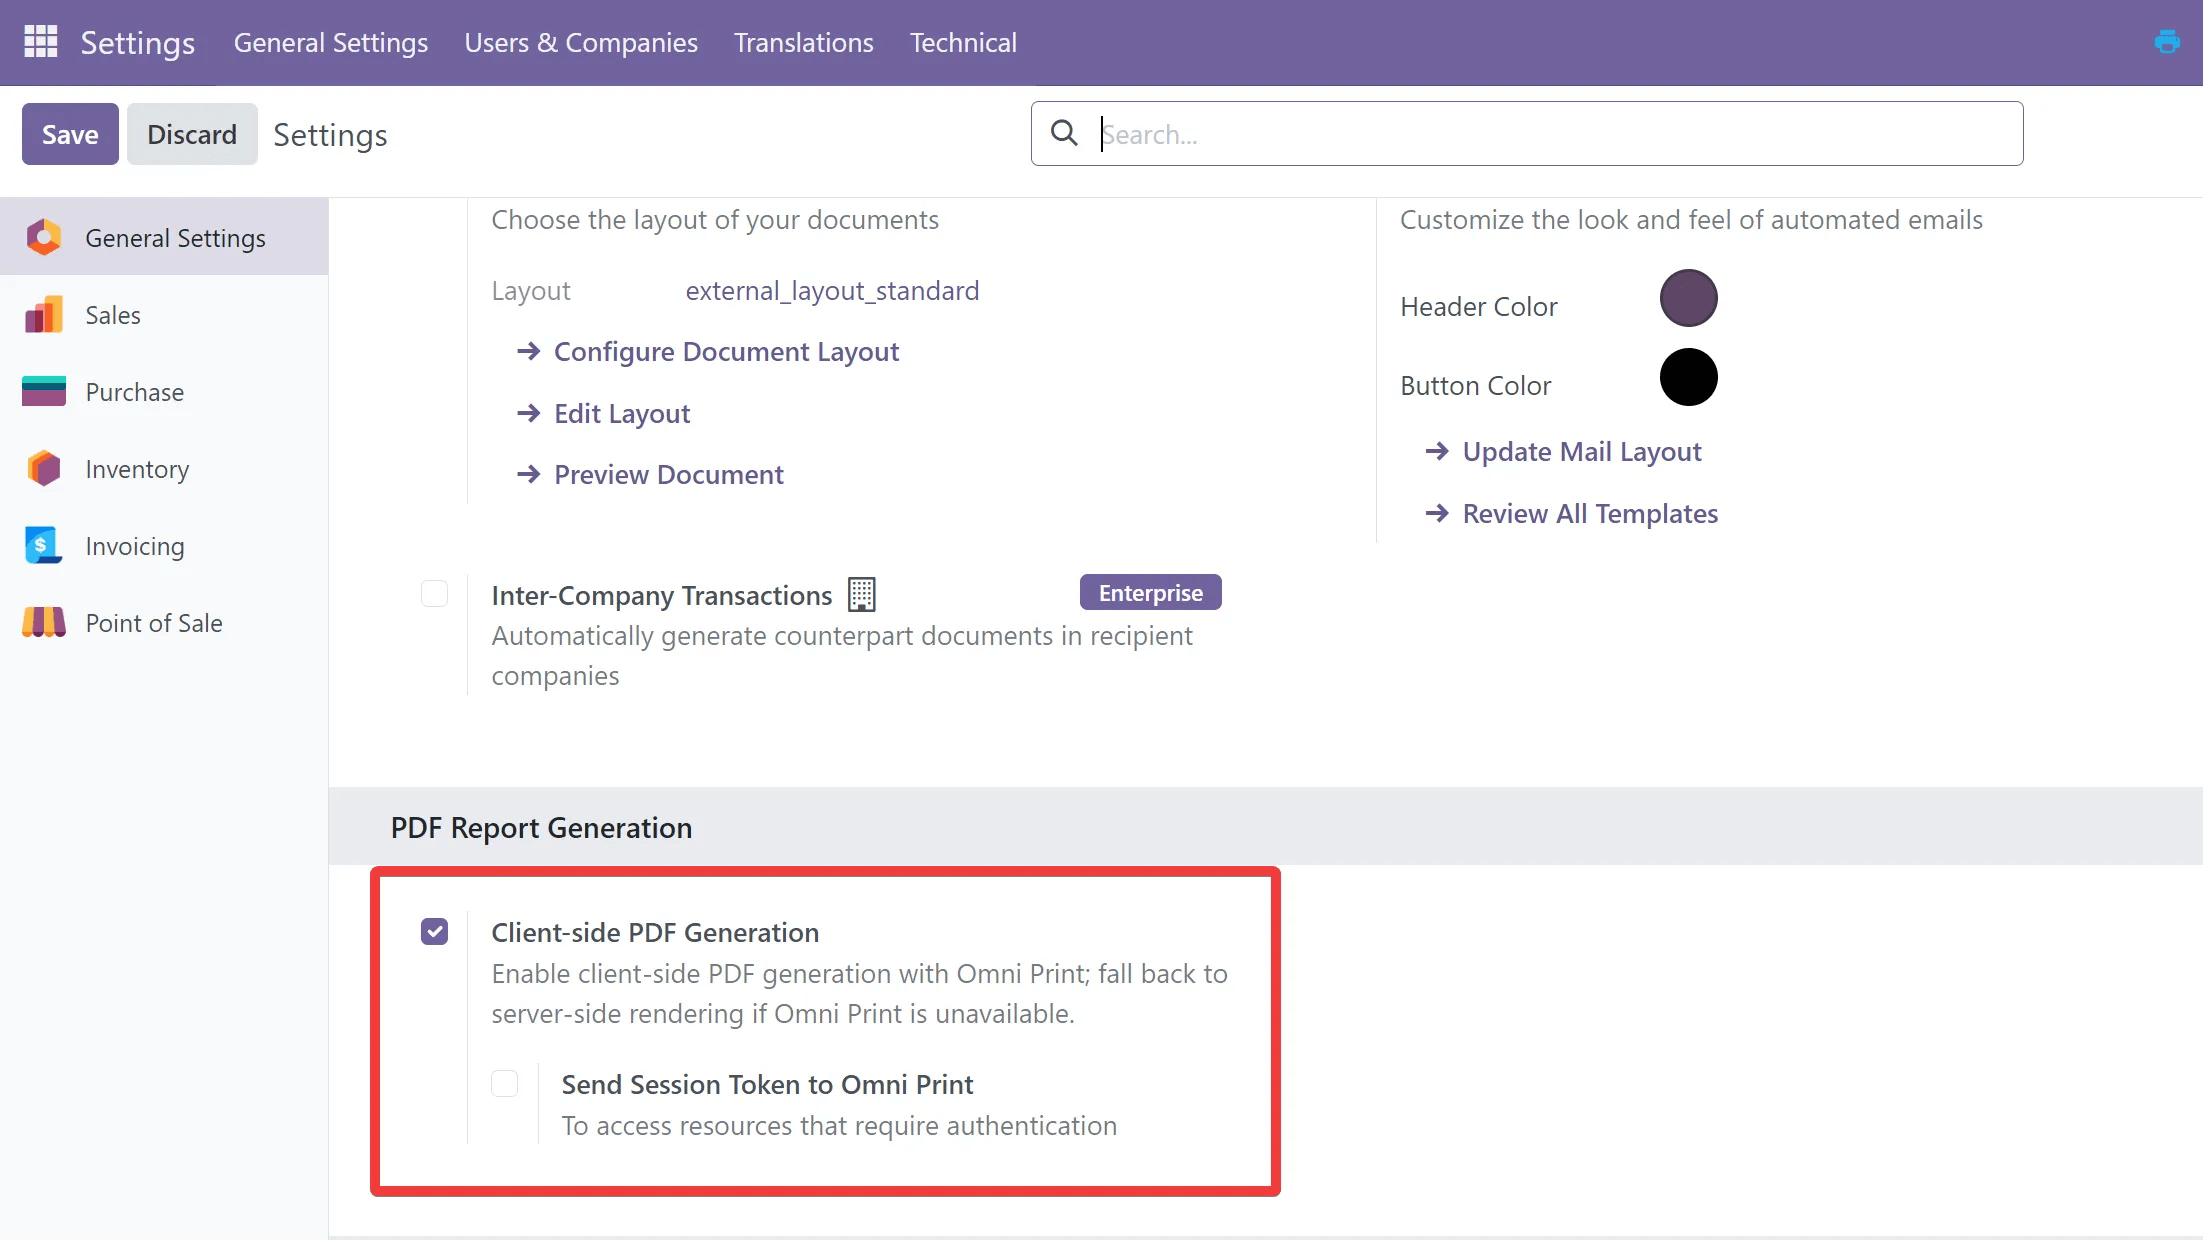
Client-side PDF Generation
Section titled “Client-side PDF Generation”Navigate to: Point of Sale > Configuration > PDF Report Generation.
| Setting | Description |
|---|---|
| Client-side PDF Rendering | Render PDFs on the client using the client-side app for better performance and fewer server resources. |